
Sending out a new shipment? You need to add the products to your store.
Follow these steps to add products to your Hub234 storefront. For each product, include high-quality images, accurate details, and proper labels to ensure smooth processing and fulfillment.
1. Add Only In-Stock Items
– Important: Only add products that you are shipping to Hub234’s warehouse or have already sent. If a product is listed but out of stock, it may be removed to prevent customers from placing unavailable orders.
2. Use Descriptive Photos
– Photos Matter: Upload clear, high-resolution images of each product. If you have similar items with slight design differences, include images that show these details to avoid mix-ups during fulfillment.
3. Name and Label Your Products
– SKU/Labels: Label each product with a unique SKU code or descriptive name. This code or name will help identify the product in our system and during fulfillment. You may create your own SKU or use product names as identifiers.
4. Complete Product Details
– Product Information: Fill in the product’s description, price, size options, and any other key details. Ensure that descriptions are accurate and cover all relevant aspects to give customers a complete understanding of the item.
5. Shipping and Return Policies
– Set Policies: Ensure that your store’s shipping and return policies are clearly outlined under your profile settings. This gives customers a clear idea of your brand’s service and guarantees.
Once you’ve completed these steps, your products will be pending approval. After Hub234 receives and approves your items at the warehouse, they will become available for sale on your storefront.
For further assistance, refer to our product guide or contact our support team.
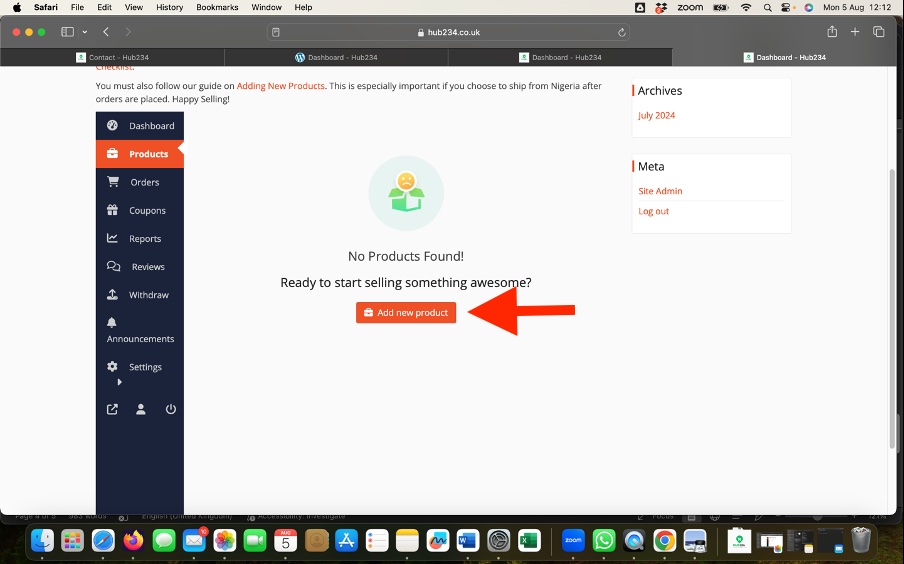
Step 1: Navigate to the Products Section
- In the left-hand sidebar, hover over “Products.”
- Click on “Add New Products” to create a new product.
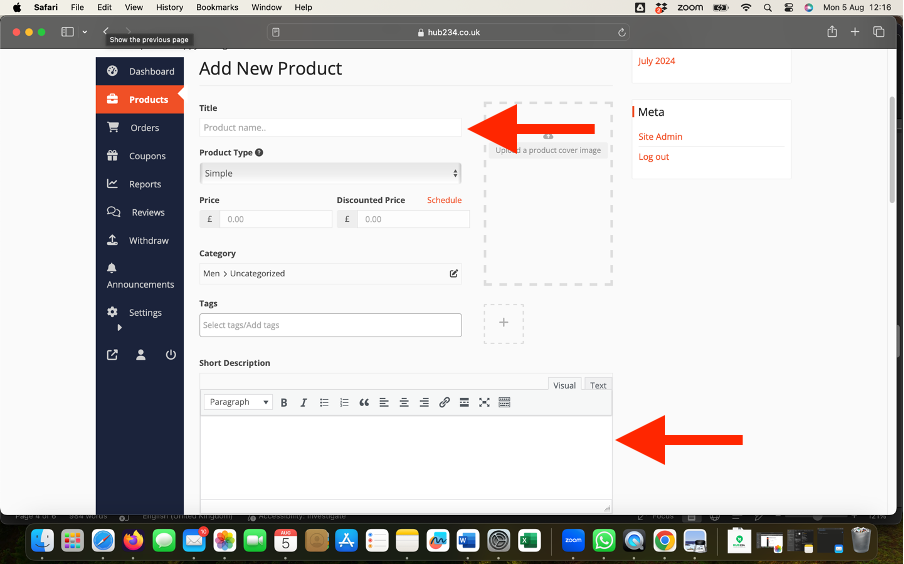
Step 2: Add Product Title and Description
- Enter the product title in the “Product Name” field.
- In the main content area, add a detailed description of your product. This can include features, benefits, and any other relevant information.
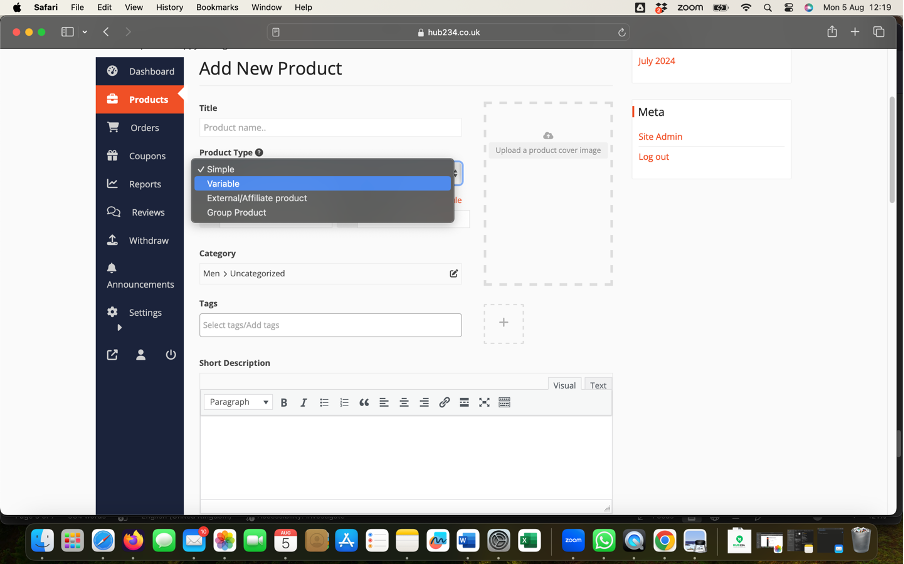
Step 3: Select Product Type
- Scroll down to the “Product Data” section.
- In the dropdown menu at the top, select “Variable product.” to set a product that has sizes or colours.
- If your product has no variations just leave this as “Simple”.
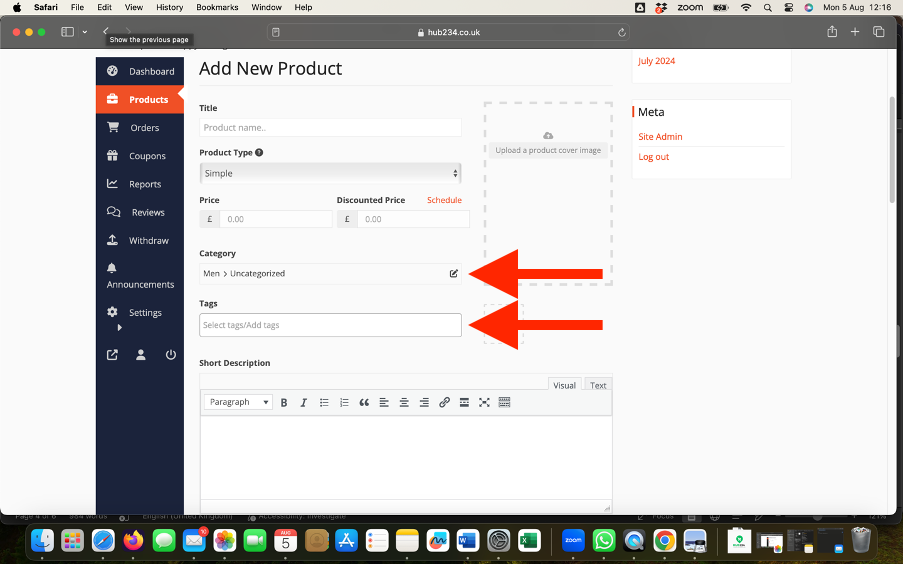
Step 4: Set Product Categories and Tags
- On the right sidebar, under the “Product categories” section, select the appropriate categories for your product.
- Add any relevant product tags to help with search and organization (Optional).
Step 5: Add Product Images
- Scroll up to the “Product image” section on the right sidebar.
- Click “Set product image” to upload the main image for your product.
- Click “+” to upload additional images.

Step 6: Add Inventory
- Click on the “Enable Product Stock Management” checkbox.
- Enter the available quantity of the product.
- Set your reorder levels (Optional).

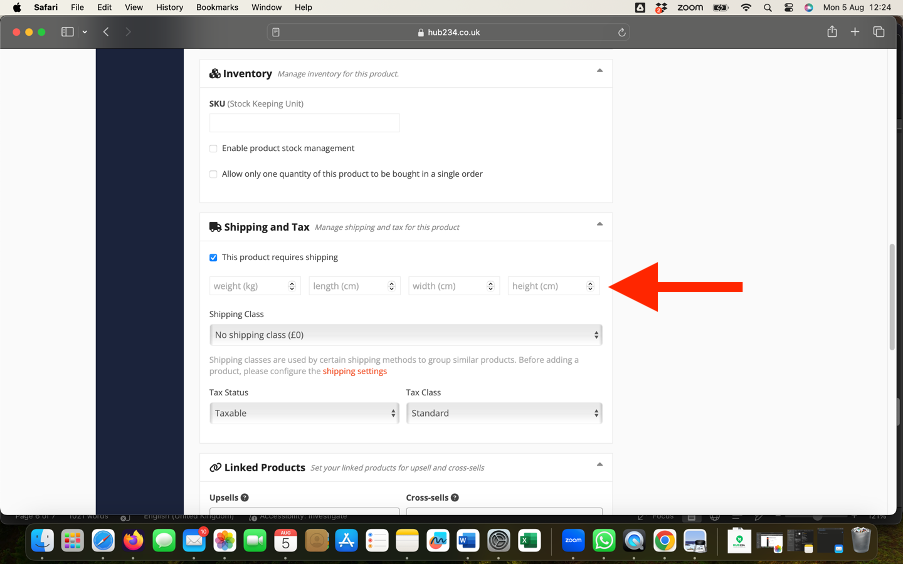
Step 7: Add Shipping Information
- Make sure the “This product requires shipping” check box is selected!
- Enter the “Weight”, “Height”, “Width” and “Length” of your product when it is packaged for shipping. *Very Important or package may be rejected*
- Change Shipping Class to “Insured Shipping”. *Very important or your package will be sent without insurance*
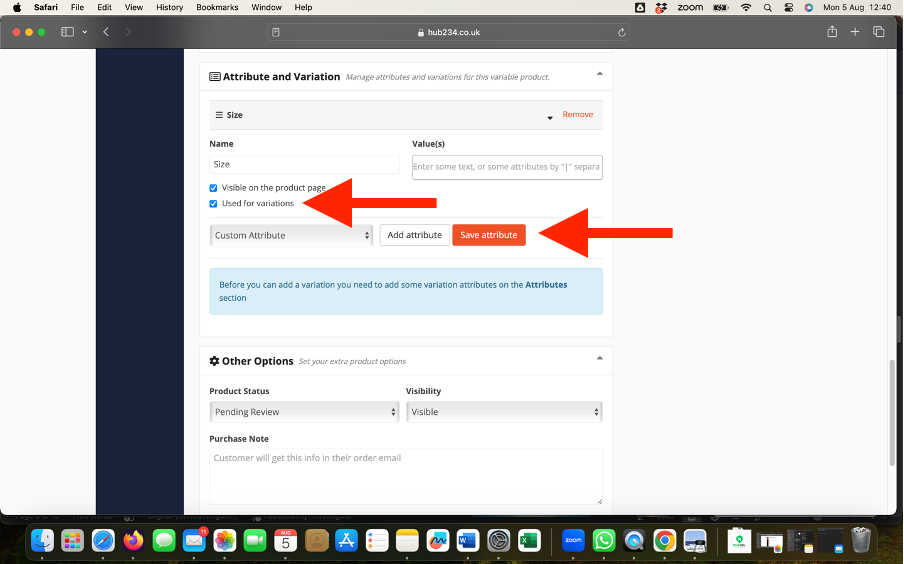
Step 8: Add Product Attributes
- Click on the “Attributes” tab within the “Attributes and Variations” section.
- Click the “Add Attribute” button next to the “Custom product attribute” dropdown.
- Enter the attribute name (e.g., Size, Color).
- In the “Value(s)” field, enter all possible values for this attribute, separated by a pipe (|) symbol (shown below). For example, for sizes, you might enter: Small|Medium|Large.
- Check the box labeled “Used for variations.”
- Click the “Save attributes” button.
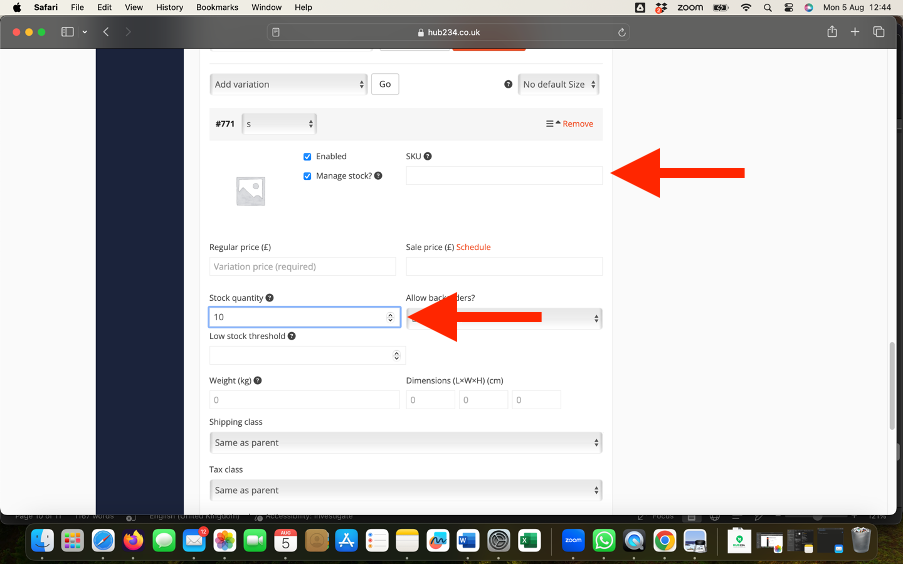
Step 9: Create Product Variations
- In the dropdown menu, select “Create variations from all attributes” and click “Go.” This will generate all possible combinations of your attributes.
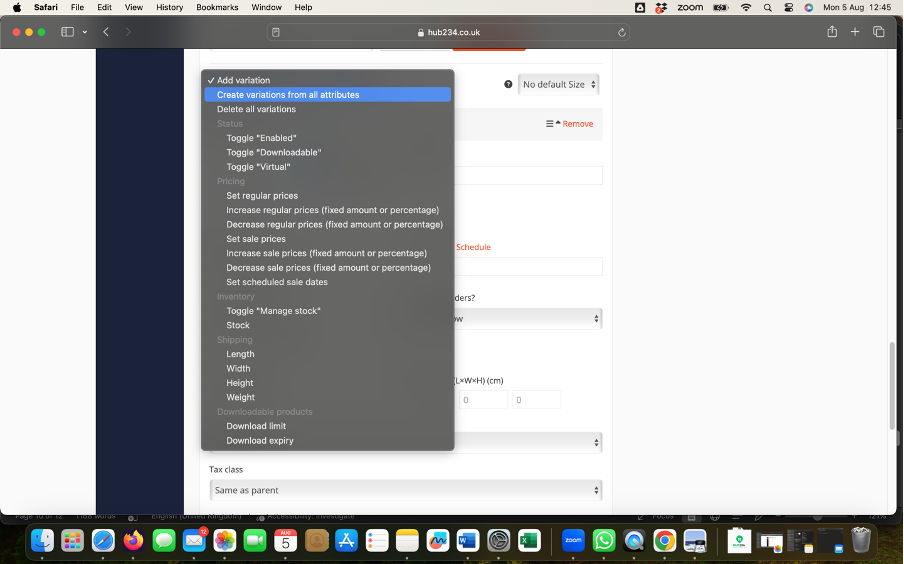
- For each variation, you can:
- Click the arrow to expand the variation.
- Set specific details such as regular price, sale price, stock status, SKU, dimensions, and shipping class. (Optional but if you want specific numbers of each variation, you have to set this here))
- Add a unique image for each variation if desired.
- Click “Save Variations” after configuring each variation.
Step 10: Set Product Status
- Set the “Product Status” to “Published” or “Pending Review”. *Important or Product will not show on your storefront*.
- Set the “Visibility” to “Visible”.
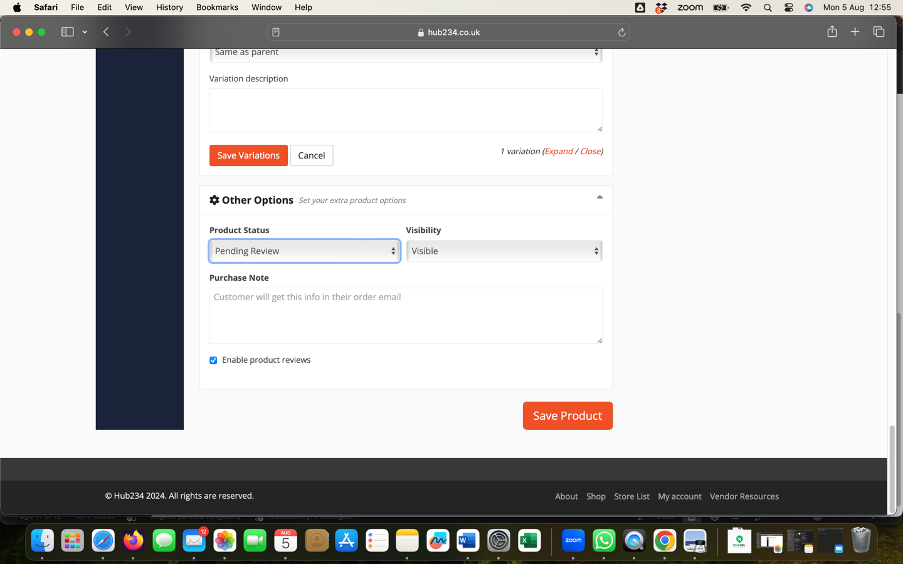
Step 11: Publish the Product
- Once you have entered all the necessary information and configured your product variations, click the “Save Product” button.
Additional Tips
- Stock Management: If you want to manage stock for each variation, ensure that you configure the stock status and quantity for each one.
- SEO: Use SEO plugins like Yoast SEO to optimize your product descriptions and images for better search engine visibility.
- Testing: Before going live, test the product variations to ensure everything is functioning correctly on the front end.